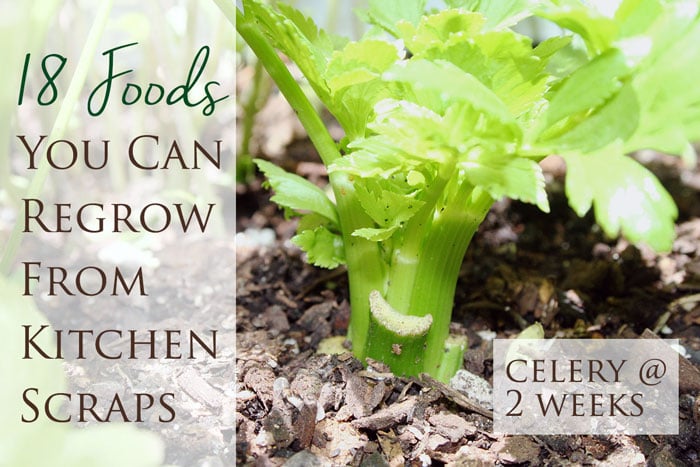
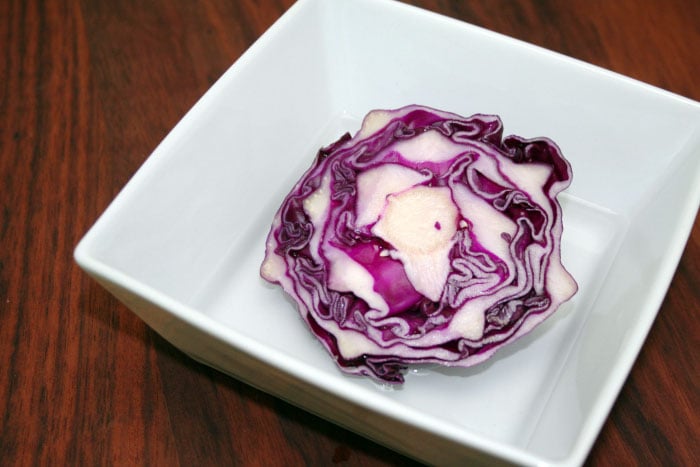
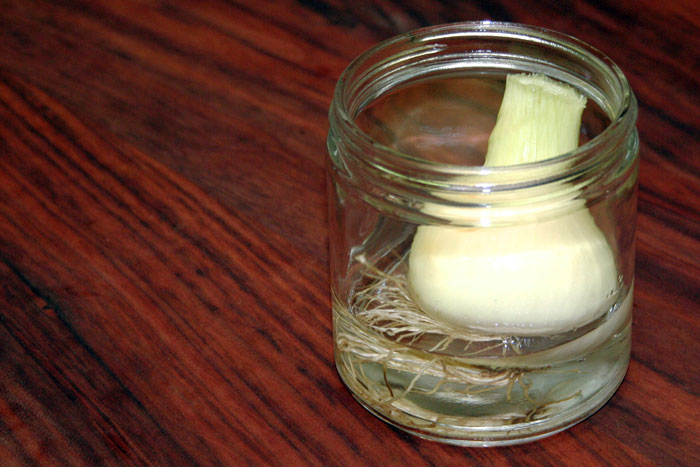
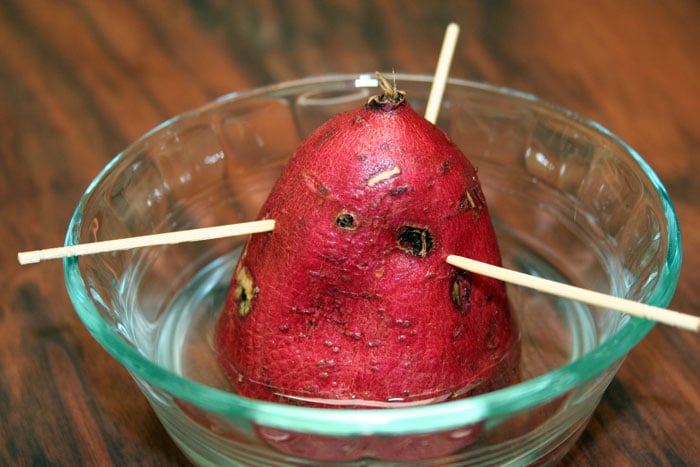
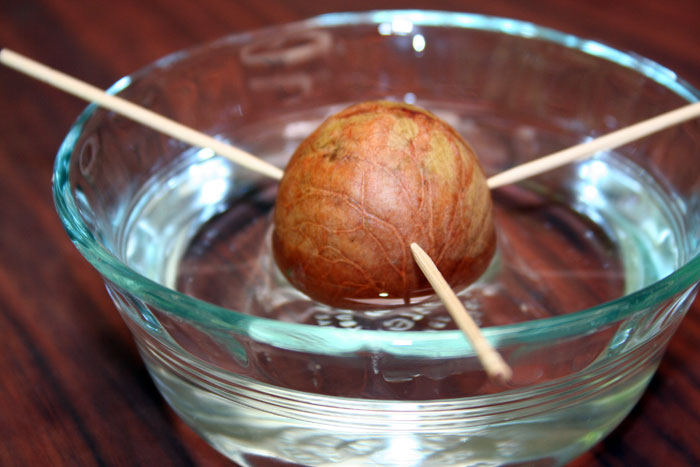
I’m excited to be back at My Heart Beets today to expand on this post and talk about how you can regrow your own garden from food scraps you normally throw away. According to the U.S. Environmental Protection Agency, 31 percent of the 430 billion pounds of food produced in the United States goes uneaten (source). In 2012, more than 36 million tons of food waste was generated and only 5 percent was diverted for composting (source). We can change the amount of waste produced dramatically – by regrowing our food scraps into edible plants. Not only is this practice environmentally friendly (keeping food waste out of landfills) but it is also makes economic sense for our wallets (serves as free food). It’s also a nice learning experience for kids. They get to learn about the process and watch their food grow. For the best results, use organic fruits and vegetables along with organic compost soil. I would also suggest looking at a planting schedule for your area before starting your indoor or outdoor garden. In addition to regrowing scraps, you can also save your vegetable seeds to grow your favorite vegetables. I’ll talk about this at the end of the post. Step 1 – Cut the base off and put it bottom down in a bowl of shallow water (no more than ¼ inch paste the base). You need to add enough water for the whole base to be covered but do not saturate otherwise it will become soggy. Replace the water every few days. Step 2 – In 1 week you should see regrowth coming up through the center. Once this happens you will want to transfer the vegetable to a container or plant it in the ground for further growth. Be sure to plant with only the new growth above the soil and water regularly. Step 3 – In about 5 months the plant will be full grown and ready to harvest. Step 1 – Remove the head/cap of the mushroom. Step 2 – Plant the mushrooms stalks in soil with only the top surface of it exposed. Step 3 – Harvest when fully grown. Step 1 – Save the last 2 inches of the bottom of the plant (roots intact). Place in a cup of water (mason jars work wonderfully) with the roots down, leaving ½ inch of the top exposed. Then place on a sunny windowsill. Replace the water every day. Step 2 – In 3 to 5 days you will see regrowth. For green onions, leeks, scallions, fennel, and scallions you can leave them in the cup of water. For lemongrass, plant in soil. Step 3 – Harvest when fully grown, only cutting what you need for cooking while leaving the roots in the water. Repeat the steps with the same root ends. Harvest lemongrass once it becomes a foot tall. Cut off what you need without uprooting the plant. Step 1 – Plant a large garlic clove in a small container root-end down and 2 inches below the soil. Each clove will produce 1 bulb of garlic. Step 2 – Place the container in a sunny windowsill where there is plenty of direct sunlight and keep the soil very moist. Step 3 – Once the garlic is establish, cut back the new shoots so the plant has energy to produce more bulbs. Harvest when fully grown, about 5 months. Tip – I tried to plant it in the ground once it started to regrow and it died immediately. I would recommend keeping garlic in a container so you can keep the soil very moist. Note from Ashley: I wrote a post on how to grow garlic scapes in a shot glass that you might want to read! Step 1 – Cut about 2 to 3 inches of new growth from an established basil plant, just above two leaf nodes. Step 2 – Remove the bottom leaves and place in a cup of water – making sure the bottom is fully submerged in water. Place in a sunny windowsill and replace the water regularly. Step 3 – In about 2 months you should see roots forming. Let the roots grow to at least 1 inch long then transfer into a container or in the ground. Water regularly to see a full plant grow. Step 1 – Soak a fresh chunk of ginger overnight. Be sure the ginger has a few growing buds (little bumps on the end of the ginger). Step 2 – Plant the ginger in a container with the growth buds pointing up in moist soil and water every day until shoots appear then water regularly. Step 3 – Harvest in 1 year or until the buds have grown into usable pieces. Step 1 – Cut the potato in half and push 3 toothpicks midway around the potato. Place it cut side down in a glass of water, you want the potato to hang down in the water about ½ inch. Place on a sunny windowsill and replace water every few days. Step 2 – In 2-3 weeks you will see potato plants (slips) growing out of the top. Once the splits reach 5-6 inches long, twist them off and put them in a cup of water to generate roots. Once the roots reach 1 inch long, plant them in loose, well-drained soil either in a container or in the ground. Water every day for a week then water regularly until harvested. Step 3 – Harvest in 2 to 4 months or when the plant reaches 1 foot in height. A good indicator the potatoes are ready to harvest is when the tops of the plant die off or turn yellow. Carefully search the soil with your hands – don’t use anything sharp, it could puncture the potatoes. Tip – Store sweet potatoes in a warm, dry place for 2 weeks. This is what gives them a sweet taste. Step 1 – Place carrot tops bottom down on a plate. Step 2 – Add water to the plate so there is ¼ inch of water past the base. Set near a sunny windowsill. Step 3 – Once the carrot has regrown greens, transfer to an indoor container and water regularly. Tip – You can use the carrot greens in a salad if you like. In addition to these 18 foods, you can also grow an Avocado Tree & a Pineapple Tree for decoration. While there’s a chance you may see fruit after a couple years using these methods, it really depends on your climate. Step 1 – Twist or cut the top off of a pineapple and remove the first few layers of leaves from the bottom. Step 2 – Place the crown in a cup of water, bottom down, for 3 weeks or until you see roots. Step 3 – Once roots form transfer it to a well draining house planter and keep moist. Step 1 – Clean and dry your avocado nut. Step 2 – Push 3 toothpicks in the nut around the top. Place the nut bottom down in a glass of water. Make sure there is at least a ½ inch of water covering the bottom. Place on a sunny windowsill. Step 3 – In about 3 weeks you will see the nut crack and roots form. Once this happens transfer to a medium planter and keep moist. Tip – To determine the top from bottom: look for a small circular shaped dark brown spot on the side that is more flat, this is the bottom. The top will have more of a cone look. We never had issues growing avocado trees (for decoration) from our compost pile but this may not work depending on your climate. And finally, if you are growing your vegetables from seed, here’s how to plant them: Step 1 – Save seeds from all your favorite vegetables, rinse with water, and set out to dry for a day or two. Step 2 – Place each seed 1 inch below the soil and lightly cover with soil. Step 3 – Once your seedlings are about 2 to 3 inches high transfer to larger containers or place in the ground. Water regularly. Tip – Starting vegetable seedlings inside will give you the best results. Use small containers or paper egg cartons to start seedlings (you can put paper egg cartons right into the ground). I had success with bell pepper seeds, all types of squash, tomatoes, and cantaloupe. Have you tried to regrow food from kitchen scraps? We would love to hear about your experiences in the comments below! Heidi Fiscus is an entrepreneur, real foodie, wife, and proud mama. In her spare time, she enjoys being outside barefoot, experimenting in the kitchen, learning new things, and traveling to new places.